- Spring MVC 基础知识
- Spring MVC - 主页
- Spring MVC - 概述
- Spring MVC - 环境设置
- Spring MVC - Hello World 示例
- Spring MVC - 表单处理
- Spring MVC - 表单处理
- Spring MVC - 页面重定向
- Spring MVC - 静态页面
- Spring MVC - 表单标签库
- Spring MVC - 文本框
- Spring MVC - 密码
- Spring MVC - 文本区域
- Spring MVC - 复选框
- Spring MVC - 复选框
- Spring MVC - 单选按钮
- Spring MVC - 单选按钮
- Spring MVC - 下拉菜单
- Spring MVC - 列表框
- Spring MVC - 隐藏
- Spring MVC - 错误
- Spring MVC - 上传
- Spring MVC - 处理程序映射
- Bean 名称 Url 处理程序映射
- 控制器类名处理程序映射
- 简单的 URL 处理程序映射
- Spring MVC - 控制器
- Spring MVC - 多动作控制器
- 属性方法名称解析器
- 参数 方法名称 解析器
- 可参数化视图控制器
- Spring MVC - 视图解析器
- 内部资源视图解析器
- Spring MVC - Xml 视图解析器
- 资源包视图解析器
- 多解析器映射
- Spring MVC - 集成
- Spring MVC - Hibernate 验证器
- Spring MVC - 生成 RSS 提要
- Spring MVC - 生成 XML
- Spring MVC - 生成 JSON
- Spring MVC - 生成 Excel
- Spring MVC - 生成 PDF
- Spring MVC - 使用 log4j
- 春季问答
- 春天 - 问题与解答
Spring MVC - 快速指南
Spring - MVC 框架概述
Spring Web MVC 框架提供了模型-视图-控制器架构和现成的组件,可用于开发灵活且松散耦合的 Web 应用程序。MVC 模式导致分离应用程序的不同方面(输入逻辑、业务逻辑和 UI 逻辑),同时在这些元素之间提供松散耦合。
模型封装了应用程序数据,通常它们由POJO组成。
视图 负责渲染模型数据,一般来说,它生成客户端浏览器可以解释的HTML输出。
控制器负责处理用户请求并构建适当的模型并将其传递给视图进行渲染。
调度程序Servlet
Spring Web 模型-视图-控制器 (MVC) 框架是围绕处理所有 HTTP 请求和响应的 DispatcherServlet 设计的。Spring Web MVC DispatcherServlet 的请求处理工作流程如下图所示。

以下是与 DispatcherServlet 传入 HTTP 请求相对应的事件序列 -
收到 HTTP 请求后,DispatcherServlet 查阅HandlerMapping来调用适当的 Controller。
控制器接受请求并根据使用的GET或POST 方法调用适当的服务方法。服务方法将根据定义的业务逻辑设置模型数据,并将视图名称返回给 DispatcherServlet。
DispatcherServlet 将借助ViewResolver来获取为请求定义的视图。
一旦视图完成,DispatcherServlet 就会将模型数据传递给视图,最终在浏览器上呈现该视图。
所有上述组件,即 HandlerMapping、Controller 和 ViewResolver 都是WebApplicationContext的一部分,WebApplicationContext 是普通ApplicationContext的扩展,具有 Web 应用程序所需的一些额外功能。
所需配置
我们需要通过使用web.xml文件中的 URL 映射来映射您希望 DispatcherServlet 处理的请求。以下是显示HelloWeb DispatcherServlet 的声明和映射的示例 -
<web-app id = "WebApp_ID" version = "2.4"
   xmlns = "http://java.sun.com/xml/ns/j2ee"
   xmlns:xsi = "http://www.w3.org/2001/XMLSchema-instance"
   xsi:schemaLocation = "http://java.sun.com/xml/ns/j2ee
   http://java.sun.com/xml/ns/j2ee/web-app_2_4.xsd">

   <display-name>Spring MVC Application</display-name>

   <servlet>
      <servlet-name>HelloWeb</servlet-name>
      <servlet-class>
         org.springframework.web.servlet.DispatcherServlet
      </servlet-class>
      <load-on-startup>1</load-on-startup>
   </servlet>

   <servlet-mapping>
      <servlet-name>HelloWeb</servlet-name>
      <url-pattern>*.jsp</url-pattern>
   </servlet-mapping>
</web-app>
web.xml文件将保存在Web 应用程序的WebContent/WEB-INF目录中。HelloWeb DispatcherServlet初始化后,框架将尝试从位于应用程序的 WebContent/WEB-INF 目录中名为[servlet-name]-servlet.xml的文件加载应用程序上下文。在本例中,我们的文件将为HelloWeb-servlet.xml。
接下来,<servlet-mapping>标记指示哪些 URL 将由哪个 DispatcherServlet 处理。在这里,所有以 .jsp 结尾的 HTTP 请求都将由HelloWeb DispatcherServlet处理。
如果您不想使用默认文件名[servlet-name]-servlet.xml和默认位置 WebContent/WEB-INF,则可以通过在 web.xml 中添加 servlet 侦听器ContextLoaderListener来自定义此文件名和位置文件如下 -
<web-app...>

   <!-------- DispatcherServlet definition goes here----->
   ....
   <context-param>
      <param-name>contextConfigLocation</param-name>
      <param-value>/WEB-INF/HelloWeb-servlet.xml</param-value>
   </context-param>

   <listener>
      <listener-class>
         org.springframework.web.context.ContextLoaderListener
      </listener-class>
   </listener>
</web-app>
现在,让我们检查HelloWeb-servlet.xml文件所需的配置,该文件位于 Web 应用程序的 WebContent/WEB-INF 目录中。
<beans xmlns = "http://www.springframework.org/schema/beans"
   xmlns:context = "http://www.springframework.org/schema/context"
   xmlns:xsi = "http://www.w3.org/2001/XMLSchema-instance"
   xsi:schemaLocation = "
   http://www.springframework.org/schema/beans
   http://www.springframework.org/schema/beans/spring-beans-3.0.xsd
   http://www.springframework.org/schema/context
   http://www.springframework.org/schema/context/spring-context-3.0.xsd">

   <context:component-scan base-package = "com.tutorialspoint" />

   <bean class = "org.springframework.web.servlet.view.InternalResourceViewResolver">
      <property name = "prefix" value = "/WEB-INF/jsp/" />
      <property name = "suffix" value = ".jsp" />
   </bean>

</beans>
以下是有关HelloWeb-servlet.xml文件的一些要点-
[servlet-name]-servlet.xml文件将用于创建定义的 bean,覆盖全局范围内使用相同名称定义的任何 bean 的定义。
<context:component-scan...>标签将用于激活 Spring MVC 注解扫描功能,该功能允许使用@Controller和@RequestMapping等注解。
InternalResourceViewResolver将定义用于解析视图名称的规则。根据上面定义的规则,名为hello的逻辑视图被委托给位于/WEB-INF/jsp/hello.jsp的视图实现。
现在让我们了解如何创建实际的组件,即控制器、模型和视图。
定义控制器
DispatcherServlet 将请求委托给控制器以执行特定于它的功能。@Controller注释指示特定类充当控制器的角色。@RequestMapping注释用于将 URL 映射到整个类或特定的处理程序方法。
@Controller
@RequestMapping("/hello")
public class HelloController{

   @RequestMapping(method = RequestMethod.GET)
   public String printHello(ModelMap model) {
      model.addAttribute("message", "Hello Spring MVC Framework!");
      return "hello";
   }

}
@Controller注释将该类定义为 Spring MVC控制器。这里, @RequestMapping的第一次使用表明该控制器上的所有处理方法都相对于/hello路径。
下一个注释@RequestMapping (method = RequestMethod.GET)用于声明printHello()方法作为控制器的默认服务方法来处理 HTTP GET 请求。我们可以定义另一个方法来处理同一 URL 上的任何 POST 请求。
我们还可以以另一种形式编写上述控制器,我们可以在 @RequestMapping 中添加其他属性,如下所示 -
@Controller
public class HelloController{

   @RequestMapping(value = "/hello", method = RequestMethod.GET)
   public String printHello(ModelMap model) {
      model.addAttribute("message", "Hello Spring MVC Framework!");
      return "hello";
   }

}
value属性指示处理程序方法映射到的 URL,method属性定义处理 HTTP GET 请求的服务方法。
以下是关于上面定义的控制器需要注意的一些要点 -
您将在服务方法内定义所需的业务逻辑。您可以根据需要在该方法中调用另一个方法。
根据定义的业务逻辑,您将在此方法中创建一个模型。您可以设置不同的模型属性,视图将访问这些属性来呈现结果。此示例创建一个具有属性“message”的模型。
定义的服务方法可以返回一个字符串,其中包含用于呈现模型的视图的名称。此示例返回“hello”作为逻辑视图名称。
创建 JSP 视图
Spring MVC 支持不同表示技术的多种类型的视图。其中包括 - JSP、HTML、PDF、Excel 工作表、XML、Velocity 模板、XSLT、JSON、Atom和RSS feed、JasperReports等。但是,最常见的是用 JSTL 编写的 JSP 模板。因此,让我们在 /WEB-INF/hello/hello.jsp 中编写一个简单的 hello 视图 -
<html>
   <head>
      <title>Hello Spring MVC</title>
   </head>
   <body>
      <h2>${message}</h2>
   </body>
</html>
这里${message}这是我们在控制器中设置的属性。您可以在视图中显示多个属性。
Spring MVC - 环境设置
本章将指导您如何准备开发环境以开始使用 Spring 框架。它还将教您如何在设置 Spring 框架之前在您的计算机上设置 JDK、Maven 和 Eclipse -
设置 Java 开发工具包 (JDK)
您可以从 Oracle 的 Java 站点 - Java SE 下载下载最新版本的 SDK 。您将在下载的文件中找到安装 JDK 的说明,按照给定的说明进行安装和配置设置。最后设置 PATH 和 JAVA_HOME 环境变量以引用包含 java 和 javac 的目录,通常分别为 java_install_dir/bin 和 java_install_dir。
如果您运行的是 Windows 并已将 JDK 安装在 C:\jdk-11.0.11 中,则必须将以下行放入 C:\autoexec.bat 文件中。
set PATH=C:\jdk-11.0.11;%PATH%
set JAVA_HOME=C:\jdk-11.0.11
或者,在 Windows NT/2000/XP 上,您必须右键单击“我的电脑”,选择“属性”→“高级”→“环境变量”。然后,您必须更新 PATH 值并单击“确定”按钮。
在 Unix(Solaris、Linux 等)上,如果 SDK 安装在 /usr/local/jdk-11.0.11 中并且您使用 C shell,则必须将以下内容放入 .cshrc 文件中。
setenv PATH /usr/local/jdk-11.0.11/bin:$PATH
setenv JAVA_HOME /usr/local/jdk-11.0.11
或者,如果您使用集成开发环境 (IDE),如 Borland JBuilder、Eclipse、IntelliJ IDEA 或 Sun ONE Studio,则必须编译并运行一个简单的程序来确认 IDE 知道您安装了 Java 的位置。否则,您将必须按照 IDE 文档中的规定进行正确的设置。
设置 Eclipse IDE
本教程中的所有示例都是使用 Eclipse IDE 编写的。因此,我们建议您应该在计算机上安装最新版本的 Eclipse。
要安装 Eclipse IDE,请从www.eclipse.org/downloads下载最新的 Eclipse 二进制文件。下载安装后,将二进制发行版解压到一个方便的位置。例如,在 Windows 上的 C:\eclipse 中,或在 Linux/Unix 上的 /usr/local/eclipse 中,最后适当地设置 PATH 变量。
Eclipse 可以通过在 Windows 机器上执行以下命令来启动,或者只需双击 eclipse.exe
%C:\eclipse\eclipse.exe
可以通过在 Unix(Solaris、Linux 等)机器上执行以下命令来启动 Eclipse -
$/usr/local/eclipse/eclipse
成功启动后,如果一切正常,那么它应该显示以下结果 -

安装 Apache 通用日志记录 API
您可以从https://commons.apache.org/logging/下载最新版本的 Apache Commons Logging API 。下载安装后,将二进制发行版解压到一个方便的位置。
例如 – Windows 上的 C:\commons-logging-1.1.1 或 Linux/Unix 上的 /usr/local/commons-logging1.1.1。该目录下会有如下jar文件以及其他支持文档等。

确保在此目录中正确设置 CLASSPATH 变量,否则在运行应用程序时将遇到问题。
设置 Spring 框架库
现在,如果一切正常,那么我们可以继续设置 Spring 框架。以下是在计算机上下载并安装框架的步骤。
选择要在 Windows 还是 UNIX 上安装 Spring,然后继续下一步,下载适用于 Windows 的.zip 文件和适用于 Unix 的.tz文件。
从https://repo.spring.io/release/org/springframework/spring下载最新版本的 Spring 框架二进制文件。
我们已经在Windows机器上下载了spring-5.3.14-dist.zip ,当我们解压下载的文件时,它会给出里面的目录结构-E:\spring,如下所示。

您将在目录E:\spring\libs中找到所有 Spring 库。确保在此目录中正确设置 CLASSPATH 变量;否则,我们在运行应用程序时将会遇到问题。如果我们使用Eclipse,那么就不需要设置CLASSPATH,因为所有的设置都将通过Eclipse完成。
完成最后一步后,您就可以开始第一个 Spring 示例了,您将在下一章中看到它。
Spring MVC - Hello World 示例
以下示例演示如何使用 Spring MVC 框架编写一个简单的基于 Web 的Hello World应用程序。首先,让我们准备一个可用的 Eclipse IDE,并按照后续步骤使用 Spring Web 框架开发动态 Web 应用程序。
| 步 | 描述 |
|---|---|
| 1 | 创建一个名为HelloWeb的动态Web项目,并在创建的项目中的src文件夹下创建一个包com.tutorialspoint。 |
| 2 | 将以下 Spring 和其他库拖放到文件夹WebContent/WEB-INF/lib .. |
| 3 | 在 com.tutorialspoint 包下创建一个 Java 类HelloController 。 |
| 4 | 在WebContent/WEB-INF文件夹下创建Spring配置文件web.xml和HelloWeb-servlet.xml 。 |
| 5 | 在 WebContent/WEB-INF 文件夹下创建一个名为jsp的子文件夹。在此子文件夹下创建一个视图文件hello.jsp 。 |
| 6 | 最后一步是创建源文件和配置文件的内容并导出应用程序,如下所述。 |
HelloController.java
package com.tutorialspoint;

import org.springframework.stereotype.Controller;
import org.springframework.web.bind.annotation.RequestMapping;
import org.springframework.web.bind.annotation.RequestMethod;
import org.springframework.ui.ModelMap;

@Controller
@RequestMapping("/hello")
public class HelloController{

   @RequestMapping(method = RequestMethod.GET)
   public String printHello(ModelMap model) {
      model.addAttribute("message", "Hello Spring MVC Framework!");

      return "hello";
   }

}
网络.xml
<web-app id = "WebApp_ID" version = "2.4"
   xmlns = "http://java.sun.com/xml/ns/j2ee"
   xmlns:xsi = "http://www.w3.org/2001/XMLSchema-instance"
   xsi:schemaLocation = "http://java.sun.com/xml/ns/j2ee
   http://java.sun.com/xml/ns/j2ee/web-app_2_4.xsd">

   <display-name>Spring MVC Application</display-name>

   <servlet>
      <servlet-name>HelloWeb</servlet-name>
      <servlet-class>
         org.springframework.web.servlet.DispatcherServlet
      </servlet-class>
      <load-on-startup>1</load-on-startup>
   </servlet>

   <servlet-mapping>
      <servlet-name>HelloWeb</servlet-name>
      <url-pattern>/</url-pattern>
   </servlet-mapping>

</web-app>
HelloWeb-servlet.xml
<beans xmlns = "http://www.springframework.org/schema/beans"
   xmlns:context = "http://www.springframework.org/schema/context"
   xmlns:xsi = "http://www.w3.org/2001/XMLSchema-instance"
   xsi:schemaLocation = "
   http://www.springframework.org/schema/beans
   http://www.springframework.org/schema/beans/spring-beans-3.0.xsd
   http://www.springframework.org/schema/context
   http://www.springframework.org/schema/context/spring-context-3.0.xsd">

   <context:component-scan base-package = "com.tutorialspoint" />

   <bean class = "org.springframework.web.servlet.view.InternalResourceViewResolver">
      <property name = "prefix" value = "/WEB-INF/jsp/" />
      <property name = "suffix" value = ".jsp" />
   </bean>

</beans>
你好.jsp
<%@ page contentType = "text/html; charset = UTF-8" %>
<html>
   <head>
      <title>Hello World</title>
   </head>
   <body>
      <h2>${message}</h2>
   </body>
</html>
以下是要包含在 Web 应用程序中的 Spring 和其他库的列表。我们只需将这些文件拖放到 – WebContent/WEB-INF/lib文件夹中即可。
servlet-api-xyzjar
公共日志记录 xyzjar
spring-aop-xyzjar
spring-beans-xyzjar
spring 上下文 xyzjar
弹簧核心 xyzjar
spring 表达式 xyzjar
spring-webmvc-xyzjar
spring-web-xyzjar
创建源文件和配置文件后,导出您的应用程序。右键单击您的应用程序,使用Export → WAR File选项并将HelloWeb.war文件保存在 Tomcat 的webapps文件夹中。
现在启动 Tomcat 服务器并确保您能够使用标准浏览器从 webapps 文件夹访问其他网页。现在,尝试访问 URL - http://localhost:8080/HelloWeb/hello。如果 Spring Web 应用程序一切正常,我们将看到以下屏幕。
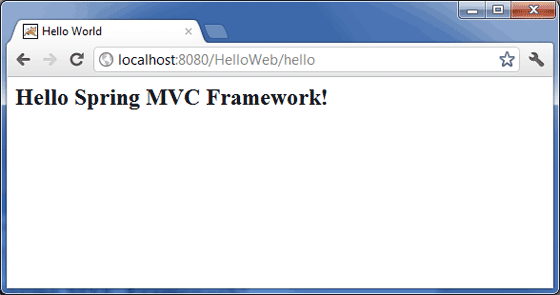
您应该注意,在给定的 URL 中,HelloWeb是应用程序名称,hello 是虚拟子文件夹,我们在控制器中使用 @RequestMapping("/hello") 提到过它。您可以在使用@RequestMapping("/")映射 URL 时使用直接 root ,在这种情况下,您可以使用短 URL http://localhost:8080/HelloWeb/访问同一页面,但建议在下面具有不同的功能不同的文件夹。
Spring MVC - 表单处理示例
以下示例演示如何使用 Spring MVC 框架编写一个简单的基于 Web 的Hello World应用程序。首先,让我们准备一个可用的 Eclipse IDE,并按照后续步骤使用 Spring Web 框架开发动态 Web 应用程序。
| 步 | 描述 |
|---|---|
| 1 | 按照 Spring MVC - Hello World 章节中的说明,在 com.tutorialspoint 包下创建一个名为 HelloWeb 的项目。 |
| 2 | 在 com.tutorialspoint 包下创建 Java 类 Student、StudentController。 |
| 3 | 在jsp子文件夹下创建视图文件student.jsp、result.jsp。 |
| 4 | 最后一步是创建源文件和配置文件的内容并导出应用程序,如下所述。 |
学生.java
package com.tutorialspoint;

public class Student {
   private Integer age;
   private String name;
   private Integer id;

   public void setAge(Integer age) {
      this.age = age;
   }
   public Integer getAge() {
      return age;
   }

   public void setName(String name) {
      this.name = name;
   }
   public String getName() {
      return name;
   }

   public void setId(Integer id) {
      this.id = id;
   }
   public Integer getId() {
      return id;
   }
}
StudentController.java
package com.tutorialspoint;

import org.springframework.stereotype.Controller;
import org.springframework.web.bind.annotation.ModelAttribute;
import org.springframework.web.bind.annotation.RequestMapping;
import org.springframework.web.bind.annotation.RequestMethod;
import org.springframework.web.servlet.ModelAndView;
import org.springframework.ui.ModelMap;

@Controller
public class StudentController {

   @RequestMapping(value = "/student", method = RequestMethod.GET)
   public ModelAndView student() {
      return new ModelAndView("student", "command", new Student());
   }

   @RequestMapping(value = "/addStudent", method = RequestMethod.POST)
   public String addStudent(@ModelAttribute("SpringWeb")Student student,
   ModelMap model) {
      model.addAttribute("name", student.getName());
      model.addAttribute("age", student.getAge());
      model.addAttribute("id", student.getId());

      return "result";
   }
}
在这里,第一个服务方法Student(),我们在 ModelAndView 对象中传递了一个名为“command”的空白 Student 对象。这样做是因为如果我们在 JSP 文件中使用 <form:form> 标签,Spring 框架需要一个名为“command”的对象。因此,当调用student()方法时,它返回student.jsp视图。
第二个服务方法addStudent()将根据 HelloWeb/addStudent URL 上的 POST 方法调用。您将根据提交的信息准备模型对象。最后,服务方法将返回一个“结果”视图,这将导致呈现 result.jsp。
学生.jsp
<%@taglib uri="http://www.springframework.org/tags/form" prefix = "form"%>
<html>
   <head>
      <title>Spring MVC Form Handling</title>
   </head>

   <body>
      <h2>Student Information</h2>
      <form:form method = "POST" action = "/HelloWeb/addStudent">
         <table>
            <tr>
               <td><form:label path = "name">Name</form:label></td>
               <td><form:input path = "name" /></td>
            </tr>
            <tr>
               <td><form:label path = "age">Age</form:label></td>
               <td><form:input path = "age" /></td>
            </tr>
            <tr>
               <td><form:label path = "id">id</form:label></td>
               <td><form:input path = "id" /></td>
            </tr>
            <tr>
               <td colspan = "2">
                  <input type = "submit" value = "Submit"/>
               </td>
            </tr>
         </table>
      </form:form>
   </body>
</html>
结果.jsp
<%@taglib uri = "http://www.springframework.org/tags/form" prefix = "form"%>
<html>
   <head>
      <title>Spring MVC Form Handling</title>
   </head>
   <body>

      <h2>Submitted Student Information</h2>
      <table>
         <tr>
            <td>Name</td>
            <td>${name}</td>
         </tr>
         <tr>
            <td>Age</td>
            <td>${age}</td>
         </tr>
         <tr>
            <td>ID</td>
            <td>${id}</td>
         </tr>
      </table>
   </body>
</html>
创建完源文件和配置文件后,导出您的应用程序。右键单击您的应用程序,使用 Export → WAR File 选项并将SpringWeb.war文件保存在 Tomcat 的 webapps 文件夹中。
现在,启动 Tomcat 服务器并确保您能够使用标准浏览器从 webapps 文件夹访问其他网页。现在,尝试使用 URL – http://localhost:8080/SpringWeb/student,如果 Spring Web 应用程序一切正常,您应该会看到以下屏幕。

提交所需信息后,单击“提交”按钮以提交表格。如果您的 Spring Web 应用程序一切正常,您应该会看到以下屏幕。

Spring MVC - 页面重定向示例
以下示例展示了如何编写一个简单的基于 Web 的应用程序,该应用程序利用重定向将 http 请求传输到另一个页面。首先,让我们准备一个可用的 Eclipse IDE,并考虑以下步骤来使用 Spring Web 框架开发基于动态表单的 Web 应用程序 -
| 步 | 描述 |
|---|---|
| 1 | 按照 Spring MVC - Hello World 章节中的说明,在 com.tutorialspoint 包下创建一个名为 HelloWeb 的项目。 |
| 2 | 在 com.tutorialspoint 包下创建一个 Java 类 WebController。 |
| 3 | 在jsp子文件夹下创建视图文件index.jsp、final.jsp。 |
| 4 | 最后一步是创建源文件和配置文件的内容并导出应用程序,如下所述。 |
WebController.java
package com.tutorialspoint;

import org.springframework.stereotype.Controller;
import org.springframework.web.bind.annotation.RequestMapping;
import org.springframework.web.bind.annotation.RequestMethod;

@Controller
public class WebController {

   @RequestMapping(value = "/index", method = RequestMethod.GET)
   public String index() {
	   return "index";
   }

   @RequestMapping(value = "/redirect", method = RequestMethod.GET)
   public String redirect() {

      return "redirect:finalPage";
   }

   @RequestMapping(value = "/finalPage", method = RequestMethod.GET)
   public String finalPage() {

      return "final";
   }
}
以下是Spring视图文件index.jsp的内容。这将是一个登陆页面,该页面将向 access-redirect 服务方法发送一个请求,该方法会将这个请求重定向到另一个服务方法,最后将显示一个Final.jsp 页面。
索引.jsp
<%@taglib uri = "http://www.springframework.org/tags/form" prefix = "form"%>
<html>
   <head>
      <title>Spring Page Redirection</title>
   </head>
   <body>
      <h2>Spring Page Redirection</h2>
      <p>Click below button to redirect the result to new page</p>
      <form:form method = "GET" action = "/HelloWeb/redirect">
         <table>
            <tr>
               <td>
                  <input type = "submit" value = "Redirect Page"/>
               </td>
            </tr>
         </table>
      </form:form>
   </body>
</html>
最终.jsp
<%@taglib uri = "http://www.springframework.org/tags/form" prefix = "form"%>
<html>

   <head>
      <title>Spring Page Redirection</title>
   </head>

   <body>
      <h2>Redirected Page</h2>
   </body>

</html>
创建源文件和配置文件后,导出您的应用程序。右键单击您的应用程序,使用 Export → WAR File 选项并将 HelloWeb.war 文件保存在 Tomcat 的 webapps 文件夹中。
现在,启动 Tomcat 服务器并确保您能够使用标准浏览器从 webapps 文件夹访问其他网页。尝试使用 URL –http://localhost:8080/HelloWeb/index,如果 Spring Web 应用程序一切正常,您应该会看到以下屏幕。

现在单击“重定向页面”按钮提交表单并进入最终的重定向页面。如果我们的 Spring Web 应用程序一切正常,我们应该看到以下屏幕 -

Spring MVC - 静态页面示例
以下示例展示了如何使用 Spring MVC 框架编写一个简单的基于 Web 的应用程序,该应用程序可以在 <mvc:resources> 标记的帮助下访问静态页面和动态页面。
首先,让我们准备好一个可用的 Eclipse IDE,并按照以下步骤使用 Spring Web 框架开发基于动态表单的 Web 应用程序。
| 步 | 描述 |
|---|---|
| 1 | 按照 Spring MVC - Hello World 章节中的说明,在 com.tutorialspoint 包下创建一个名为 HelloWeb 的项目。 |
| 2 | 在 com.tutorialspoint 包下创建一个 Java 类 WebController。 |
| 3 | 在jsp子文件夹下创建静态文件final.htm 。 |
| 4 | 更新WebContent/WEB-INF文件夹下的Spring配置文件HelloWeb-servlet.xml,如下所示。 |
| 5 | 最后一步是创建源文件和配置文件的内容并导出应用程序,如下所述。 |
WebController.java
package com.tutorialspoint;

import org.springframework.stereotype.Controller;
import org.springframework.web.bind.annotation.RequestMapping;
import org.springframework.web.bind.annotation.RequestMethod;

@Controller
public class WebController {

   @RequestMapping(value = "/index", method = RequestMethod.GET)
   public String index() {
	   return "index";
   }

   @RequestMapping(value = "/staticPage", method = RequestMethod.GET)
   public String redirect() {

      return "redirect:/pages/final.htm";
   }
}
HelloWeb-servlet.xml
<?xml version = "1.0" encoding = "UTF-8"?>
<beans xmlns = "http://www.springframework.org/schema/beans"
   xmlns:xsi = "  http://www.w3.org/2001/XMLSchema-instance"
   xmlns:context = "http://www.springframework.org/schema/context"
   xmlns:mvc = "http://www.springframework.org/schema/mvc"
   xsi:schemaLocation = "http://www.springframework.org/schema/beans
   http://www.springframework.org/schema/beans/spring-beans-2.5.xsd
   http://www.springframework.org/schema/mvc
   http://www.springframework.org/schema/mvc/spring-mvc-3.0.xsd
   http://www.springframework.org/schema/context
   http://www.springframework.org/schema/context/spring-context-3.0.xsd">

   <context:component-scan base-package = "com.tutorialspoint" />

   <bean id = "viewResolver" class = "org.springframework.web.servlet.view.InternalResourceViewResolver">

      <property name = "prefix" value = "/WEB-INF/jsp/" />
      <property name = "suffix" value = ".jsp" />
   </bean>
   <mvc:resources mapping = "/pages/**" location = "/WEB-INF/pages/" />
   <mvc:annotation-driven/>
</beans>
这里,<mvc:resources.../>标签用于映射静态页面。映射属性必须是指定 http 请求的 URL 模式的Ant 模式。location 属性必须指定一个或多个具有静态页面(包括图像、样式表、JavaScript 和其他静态内容)的有效资源目录位置。可以使用逗号分隔的值列表来指定多个资源位置。
以下是 Spring 视图文件WEB-INF/jsp/index.jsp的内容。这将是一个登陆页面;该页面将发送一个访问staticPage 服务方法的请求,该方法会将该请求重定向到 WEB-INF/pages 文件夹中可用的静态页面。
索引.jsp
<%@taglib uri = "http://www.springframework.org/tags/form" prefix = "form"%>
<html>
   <head>
      <title>Spring Landing Page</title>
   </head>
   <body>
      <h2>Spring Landing Pag</h2>
      <p>Click below button to get a simple HTML page</p>
      <form:form method = "GET" action = "/HelloWeb/staticPage">
         <table>
            <tr>
               <td>
                  <input type = "submit" value = "Get HTML Page"/>
               </td>
            </tr>
         </table>
      </form:form>
   </body>
</html>
最终.htm
<html>
   <head>
      <title>Spring Static Page</title>
   </head>
   <body>
      <h2>A simple HTML page</h2>
   </body>
</html>
创建源文件和配置文件后,导出您的应用程序。右键单击您的应用程序,使用 Export → WAR File 选项并将 HelloWeb.war 文件保存在 Tomcat 的 webapps 文件夹中。
现在,启动 Tomcat 服务器并确保您能够使用标准浏览器从 webapps 文件夹访问其他网页。现在尝试访问 URL – http://localhost:8080/HelloWeb/index。如果 Spring Web 应用程序一切正常,我们将看到以下屏幕。

单击“获取 HTML 页面”按钮即可访问 staticPage 服务方法中提到的静态页面。如果您的 Spring Web 应用程序一切正常,我们将看到以下屏幕。

Spring MVC - 文本框示例
以下示例演示如何使用 Spring Web MVC 框架在表单中使用文本框。首先,让我们准备好一个可用的 Eclipse IDE,并按照以下步骤使用 Spring Web 框架开发基于动态表单的 Web 应用程序 -
| 步 | 描述 |
|---|---|
| 1 | 按照 Spring MVC - Hello World 示例章节中的说明,在 com.tutorialspoint 包下创建一个名为 HelloWeb 的项目。 |
| 2 | 在com.tutorialspoint包下创建Java类Student、StudentController。 |
| 3 | 在jsp子文件夹下创建视图文件student.jsp、result.jsp。 |
| 4 | 最后一步是创建源文件和配置文件的内容并导出应用程序,如下所述。 |
学生.java
package com.tutorialspoint;

public class Student {
   private Integer age;
   private String name;
   private Integer id;

   public void setAge(Integer age) {
      this.age = age;
   }
   public Integer getAge() {
      return age;
   }

   public void setName(String name) {
      this.name = name;
   }
   public String getName() {
      return name;
   }

   public void setId(Integer id) {
      this.id = id;
   }
   public Integer getId() {
      return id;
   }
}
StudentController.java
package com.tutorialspoint;

import org.springframework.stereotype.Controller;
import org.springframework.web.bind.annotation.ModelAttribute;
import org.springframework.web.bind.annotation.RequestMapping;
import org.springframework.web.bind.annotation.RequestMethod;
import org.springframework.web.servlet.ModelAndView;
import org.springframework.ui.ModelMap;

@Controller
public class StudentController {

   @RequestMapping(value = "/student", method = RequestMethod.GET)
   public ModelAndView student() {
      return new ModelAndView("student", "command", new Student());
   }

   @RequestMapping(value = "/addStudent", method = RequestMethod.POST)
   public String addStudent(@ModelAttribute("SpringWeb")Student student,
      ModelMap model) {
      model.addAttribute("name", student.getName());
      model.addAttribute("age", student.getAge());
      model.addAttribute("id", student.getId());

      return "result";
   }
}
这里,第一个服务方法Student(),我们在 ModelAndView 对象中传递了一个名为“command”的空白 Student 对象,因为 spring 框架需要一个名为“command”的对象,如果您在中使用 <form:form >标签你的 JSP 文件。因此,当调用 Student() 方法时,它返回Student.jsp view。
第二个服务方法addStudent()将根据HelloWeb/addStudent URL上的 POST 方法调用。您将根据提交的信息准备模型对象。最后,服务方法将返回一个“结果”视图,这将导致渲染 result.jsp
学生.jsp
<%@taglib uri = "http://www.springframework.org/tags/form" prefix = "form"%>
<html>
   <head>
      <title>Spring MVC Form Handling</title>
   </head>
   <body>

      <h2>Student Information</h2>
      <form:form method = "POST" action = "/HelloWeb/addStudent">
         <table>
            <tr>
               <td><form:label path = "name">Name</form:label></td>
               <td><form:input path = "name" /></td>
            </tr>
            <tr>
               <td><form:label path = "age">Age</form:label></td>
               <td><form:input path = "age" /></td>
            </tr>
            <tr>
               <td><form:label path = "id">id</form:label></td>
               <td><form:input path = "id" /></td>
            </tr>
            <tr>
               <td colspan = "2">
                  <input type = "submit" value = "Submit"/>
               </td>
            </tr>
         </table>
      </form:form>
   </body>
</html>
在这里,我们使用<form:input />标签来呈现 HTML 文本框。例如 -
<form:input path = "name" />
它将呈现以下 HTML 内容。
<input id = "name" name = "name" type = "text" value = ""/>
结果.jsp
<%@taglib uri = "http://www.springframework.org/tags/form" prefix = "form"%>
<html>
   <head>
      <title>Spring MVC Form Handling</title>
   </head>
   <body>

      <h2>Submitted Student Information</h2>
      <table>
         <tr>
            <td>Name</td>
            <td>${name}</td>
         </tr>
         <tr>
            <td>Age</td>
            <td>${age}</td>
         </tr>
         <tr>
            <td>ID</td>
            <td>${id}</td>
         </tr>
      </table>
   </body>
</html>
创建完源文件和配置文件后,导出您的应用程序。右键单击您的应用程序,使用Export → WAR File选项并将HelloWeb.war文件保存在 Tomcat 的 webapps 文件夹中。
现在,启动 Tomcat 服务器并确保您能够使用标准浏览器从 webapps 文件夹访问其他网页。尝试使用 URL – http://localhost:8080/HelloWeb/student,如果 Spring Web 应用程序一切正常,我们将看到以下屏幕。

提交所需信息后,单击“提交”按钮以提交表格。如果 Spring Web 应用程序一切正常,我们应该会看到以下屏幕。

Spring MVC - 密码示例
以下示例描述了如何使用 Spring Web MVC 框架在表单中使用密码。首先,让我们准备好一个可用的 Eclipse IDE,并按照以下步骤使用 Spring Web 框架开发基于动态表单的 Web 应用程序。
| 步 | 描述 |
|---|---|
| 1 | 按照 Spring MVC - Hello World 章节中的说明,在 com.tutorialspoint 包下创建一个名为 HelloWeb 的项目。 |
| 2 | 在 com.tutorialspointpackage 下创建 Java 类 User、UserController。 |
| 3 | 在jsp子文件夹下创建视图文件user.jsp、users.jsp。 |
| 4 | 最后一步是创建源文件和配置文件的内容并导出应用程序,如下所述。 |
用户.java
package com.tutorialspoint;

public class User {

   private String username;
   private String password;

   public String getUsername() {
      return username;
   }
   public void setUsername(String username) {
      this.username = username;
   }

   public String getPassword() {
      return password;
   }
   public void setPassword(String password) {
      this.password = password;
   }
}
用户控制器.java
package com.tutorialspoint;

import org.springframework.stereotype.Controller;
import org.springframework.web.bind.annotation.ModelAttribute;
import org.springframework.web.bind.annotation.RequestMapping;
import org.springframework.web.bind.annotation.RequestMethod;
import org.springframework.web.servlet.ModelAndView;
import org.springframework.ui.ModelMap;

@Controller
public class UserController {

   @RequestMapping(value = "/user", method = RequestMethod.GET)
   public ModelAndView user() {
      return new ModelAndView("user", "command", new User());
   }

   @RequestMapping(value = "/addUser", method = RequestMethod.POST)
   public String addUser(@ModelAttribute("SpringWeb")User user,
      ModelMap model) {
      model.addAttribute("username", user.getUsername());
      model.addAttribute("password", user.getPassword());

      return "users";
   }
}
在这里,第一个服务方法user(),我们在 ModelAndView 对象中传递了一个名为“command”的空白 User 对象,因为如果您使用 <form:form> 标签,Spring 框架需要一个名为“command”的对象在您的 JSP 文件中。因此,当调用 user() 方法时,它返回 user.jsp 视图。
将针对 HelloWeb/addUser URL 上的 POST 方法调用第二个服务方法addUser() 。您将根据提交的信息准备模型对象。最后,“users”视图将从服务方法返回,这将导致呈现 users.jsp。
用户.jsp
<%@taglib uri = "http://www.springframework.org/tags/form" prefix = "form"%>
<html>
   <head>
      <title>Spring MVC Form Handling</title>
   </head>
   <body>

      <h2>User Information</h2>
      <form:form method = "POST" action = "/HelloWeb/addUser">
         <table>
            <tr>
               <td><form:label path = "username">User Name</form:label></td>
               <td><form:input path = "username" /></td>
            </tr>
            <tr>
               <td><form:label path = "password">Age</form:label></td>
               <td><form:password path = "password" /></td>
            </tr>
            <tr>
               <td colspan = "2">
                  <input type = "submit" value = "Submit"/>
               </td>
            </tr>
         </table>
      </form:form>
   </body>
</html>
在这里,我们使用 <form:password /> 标签来呈现 HTML 密码框。例如 -
<form:password path = "password" />
它将呈现以下 HTML 内容。
<input id = "password" name = "password" type = "password" value = ""/>
用户.jsp
<%@taglib uri = "http://www.springframework.org/tags/form" prefix = "form"%>
<html>
   <head>
      <title>Spring MVC Form Handling</title>
   </head>
   <body>
      <h2>Submitted User Information</h2>
      <table>
         <tr>
            <td>Username</td>
            <td>${username}</td>
         </tr>
         <tr>
            <td>Password</td>
            <td>${password}</td>
         </tr>
      </table>
   </body>
</html>
创建源文件和配置文件后,导出应用程序。右键单击您的应用程序,使用 Export → WAR File 选项并将 HelloWeb.war 文件保存在 Tomcat 的 webapps 文件夹中。
现在,启动 Tomcat 服务器并确保您能够使用标准浏览器从 webapps 文件夹访问其他网页。尝试使用 URL –http://localhost:8080/HelloWeb/user,如果 Spring Web 应用程序一切正常,我们将看到以下屏幕。

提交所需信息后,单击“提交”按钮以提交表格。如果 Spring Web 应用程序一切正常,我们将看到以下屏幕。

Spring MVC - TextArea 示例
以下示例说明了如何使用 Spring Web MVC 框架在表单中使用 TextArea。首先,让我们准备好一个可用的 Eclipse IDE,并按照后续步骤使用 Spring Web 框架开发基于动态表单的 Web 应用程序。
| 步 | 描述 |
|---|---|
| 1 | 按照 Spring MVC - Hello World 章节中的说明,在 com.tutorialspoint 包下创建一个名为 HelloWeb 的项目。 |
| 2 | 在 com.tutorialspointpackage 下创建 Java 类 User、UserController。 |
| 3 | 在jsp子文件夹下创建视图文件user.jsp、users.jsp。 |
| 4 | 最后一步是创建源文件和配置文件的内容并导出应用程序,如下所述。 |
用户.java
package com.tutorialspoint;

public class User {

   private String username;
   private String password;
   private String address;

   public String getUsername() {
      return username;
   }
   public void setUsername(String username) {
      this.username = username;
   }

   public String getPassword() {
      return password;
   }
   public void setPassword(String password) {
      this.password = password;
   }
   public String getAddress() {
      return address;
   }
   public void setAddress(String address) {
      this.address = address;
   }
}
用户控制器.java
package com.tutorialspoint;

import org.springframework.stereotype.Controller;
import org.springframework.web.bind.annotation.ModelAttribute;
import org.springframework.web.bind.annotation.RequestMapping;
import org.springframework.web.bind.annotation.RequestMethod;
import org.springframework.web.servlet.ModelAndView;
import org.springframework.ui.ModelMap;

@Controller
public class UserController {

   @RequestMapping(value = "/user", method = RequestMethod.GET)
   public ModelAndView user() {
      return new ModelAndView("user", "command", new User());
   }

   @RequestMapping(value = "/addUser", method = RequestMethod.POST)
   public String addUser(@ModelAttribute("SpringWeb")User user,
      ModelMap model) {
      model.addAttribute("username", user.getUsername());
      model.addAttribute("password", user.getPassword());
      model.addAttribute("address", user.getAddress());

      return "users";
   }
}
在这里,对于第一个服务方法 user(),我们在 ModelAndView 对象中传递了一个名为“command”的空白 User 对象,因为如果您使用 <form:form>,Spring 框架需要一个名为“command”的对象JSP 文件中的标记。因此,当调用 user() 方法时,它返回 user.jsp 视图。
第二个服务方法 addUser() 将根据 HelloWeb/addUser URL 上的 POST 方法调用。您将根据提交的信息准备模型对象。最后,“users”视图将从服务方法返回,这将导致呈现 users.jsp。
用户.jsp
<%@taglib uri = "http://www.springframework.org/tags/form" prefix = "form"%>
<html>
   <head>
      <title>Spring MVC Form Handling</title>
   </head>
   <body>

   <h2>User Information</h2>
   <form:form method = "POST" action = "/HelloWeb/addUser">
      <table>
         <tr>
            <td><form:label path = "username">User Name</form:label></td>
            <td><form:input path = "username" /></td>
         </tr>
         <tr>
            <td><form:label path = "password">Age</form:label></td>
            <td><form:password path = "password" /></td>
         </tr>
         <tr>
            <td><form:label path = "address">Address</form:label></td>
            <td><form:textarea path = "address" rows = "5" cols = "30" /></td>
         </tr>
         <tr>
            <td colspan = "2">
               <input type = "submit" value = "Submit"/>
            </td>
         </tr>
      </table>
   </form:form>
   </body>
</html>
在这里,我们使用<form:textarea />标签来渲染 HTML 文本区域框。例如 -
<form:textarea path = "address" rows = "5" cols = "30" />
它将呈现以下 HTML 内容。
<textarea id = "address" name = "address" rows = "5" cols = "30"></textarea>
用户.jsp
<%@taglib uri = "http://www.springframework.org/tags/form" prefix = "form"%>
<html>
   <head>
      <title>Spring MVC Form Handling</title>
   </head>
   <body>

      <h2>Submitted User Information</h2>
      <table>
         <tr>
            <td>Username</td>
            <td>${username}</td>
         </tr>
         <tr>
            <td>Password</td>
            <td>${password}</td>
         </tr>
         <tr>
            <td>Address</td>
            <td>${address}</td>
         </tr>
      </table>
   </body>
</html>
创建源文件和配置文件后,导出您的应用程序。右键单击您的应用程序,使用 Export → WAR File 选项并将 HelloWeb.war 文件保存在 Tomcat 的 webapps 文件夹中。
现在,启动 Tomcat 服务器并确保您能够使用标准浏览器从 webapps 文件夹访问其他网页。尝试使用 URL –http://localhost:8080/HelloWeb/user,如果 Spring Web 应用程序一切正常,我们将看到以下屏幕。

提交所需信息后,单击“提交”按钮以提交表格。如果 Spring Web 应用程序一切正常,我们将看到以下屏幕。

Spring MVC - 复选框示例
以下示例描述了如何使用 Spring Web MVC 框架在表单中使用单个复选框。首先,让我们准备一个可用的 Eclipse IDE,并考虑以下步骤来使用 Spring Web 框架开发基于动态表单的 Web 应用程序。
| 步 | 描述 |
|---|---|
| 1 | 在 com.tutorialspoint 包下创建一个名为 HelloWeb 的项目,如 Spring MVC - Hello World 示例章节中所述。 |
| 2 | 在 com.tutorialspointpackage 下创建 Java 类 User、UserController。 |
| 3 | 在jsp子文件夹下创建视图文件user.jsp、users.jsp。 |
| 4 | 最后一步是创建源文件和配置文件的内容并导出应用程序,如下所述。 |
用户.java
package com.tutorialspoint;

public class User {

   private String username;
   private String password;
   private String address;
   private boolean receivePaper;

   public String getUsername() {
      return username;
   }
   public void setUsername(String username) {
      this.username = username;
   }

   public String getPassword() {
      return password;
   }
   public void setPassword(String password) {
      this.password = password;
   }
   public String getAddress() {
      return address;
   }
   public void setAddress(String address) {
      this.address = address;
   }
   public boolean isReceivePaper() {
      return receivePaper;
   }
   public void setReceivePaper(boolean receivePaper) {
      this.receivePaper = receivePaper;
   }
}
用户控制器.java
package com.tutorialspoint;

import org.springframework.stereotype.Controller;
import org.springframework.web.bind.annotation.ModelAttribute;
import org.springframework.web.bind.annotation.RequestMapping;
import org.springframework.web.bind.annotation.RequestMethod;
import org.springframework.web.servlet.ModelAndView;
import org.springframework.ui.ModelMap;

@Controller
public class UserController {

   @RequestMapping(value = "/user", method = RequestMethod.GET)
   public ModelAndView user() {
      return new ModelAndView("user", "command", new User());
   }

   @RequestMapping(value = "/addUser", method = RequestMethod.POST)
   public String addUser(@ModelAttribute("SpringWeb")User user,
      ModelMap model) {
      model.addAttribute("username", user.getUsername());
      model.addAttribute("password", user.getPassword());
      model.addAttribute("address", user.getAddress());
      model.addAttribute("receivePaper", user.isReceivePaper());
      return "users";
   }
}
在这里,对于第一个服务方法 user(),我们在 ModelAndView 对象中传递了一个名为“command”的空白 User 对象,因为如果您使用 <form:form>,Spring 框架需要一个名为“command”的对象JSP 文件中的标记。因此,当调用 user() 方法时,它返回 user.jsp 视图。
第二个服务方法 addUser() 将根据 HelloWeb/addUser URL 上的 POST 方法调用。您将根据提交的信息准备模型对象。最后,“users”视图将从服务方法返回,这将导致呈现 users.jsp。
用户.jsp
<%@taglib uri = "http://www.springframework.org/tags/form" prefix = "form"%>
<html>
   <head>
      <title>Spring MVC Form Handling</title>
   </head>
   <body>

      <h2>User Information</h2>
      <form:form method = "POST" action = "/HelloWeb/addUser">
         <table>
            <tr>
               <td><form:label path = "username">User Name</form:label></td>
               <td><form:input path = "username" /></td>
            </tr>
            <tr>
               <td><form:label path = "password">Age</form:label></td>
               <td><form:password path = "password" /></td>
            </tr>
            <tr>
               <td><form:label path = "address">Address</form:label></td>
               <td><form:textarea path = "address" rows = "5" cols = "30" /></td>
            </tr>
            <tr>
               <td><form:label path = "receivePaper">Subscribe Newsletter</form:label></td>
               <td><form:checkbox path = "receivePaper" /></td>
            </tr>
            <tr>
               <td colspan = "2">
                  <input type = "submit" value = "Submit"/>
               </td>
            </tr>
         </table>
      </form:form>
   </body>
</html>
在这里,我们使用<form:checkboxes />标签来呈现 HTML 复选框。
例如 -
<form:checkbox path="receivePaper" />
它将呈现以下 HTML 内容。
<input id="receivePaper1" name = "receivePaper" type = "checkbox" value = "true"/>
<input type = "hidden" name = "_receivePaper" value = "on"/>
用户.jsp
<%@taglib uri = "http://www.springframework.org/tags/form" prefix = "form"%>
<html>
   <head>
      <title>Spring MVC Form Handling</title>
   </head>
   <body>

      <h2>Submitted User Information</h2>
      <table>
         <tr>
            <td>Username</td>
            <td>${username}</td>
         </tr>
         <tr>
            <td>Password</td>
            <td>${password}</td>
         </tr>
         <tr>
            <td>Address</td>
            <td>${address}</td>
         </tr>
         <tr>
            <td>Subscribed to Newsletter</td>
            <td>${receivePaper}</td>
         </tr>
      </table>
   </body>
</html>
创建源文件和配置文件后,导出您的应用程序。右键单击您的应用程序,使用 Export → WAR File 选项并将 HelloWeb.war 文件保存在 Tomcat 的 webapps 文件夹中。
现在,启动 Tomcat 服务器并确保您能够使用标准浏览器从 webapps 文件夹访问其他网页。尝试输入 URL – http://localhost:8080/HelloWeb/user,如果 Spring Web 应用程序一切正常,我们将看到以下屏幕。

提交所需信息后,单击“提交”按钮以提交表格。如果 Spring Web 应用程序一切正常,我们将看到以下屏幕。

Spring MVC - 复选框示例
以下示例说明了如何使用 Spring Web MVC 框架在表单中使用多个复选框。首先,让我们准备好一个可用的 Eclipse IDE,并按照以下步骤使用 Spring Web 框架开发基于动态表单的 Web 应用程序。
| 步 | 描述 |
|---|---|
| 1 | 按照 Spring MVC - Hello World 章节中的说明,在 com.tutorialspoint 包下创建一个名为 HelloWeb 的项目。 |
| 2 | 在 com.tutorialspointpackage 下创建 Java 类 User、UserController。 |
| 3 | 在jsp子文件夹下创建视图文件user.jsp、users.jsp。 |
| 4 | 最后一步是创建源文件和配置文件的内容并导出 |