- WebAssembly 教程
- WebAssembly - 主页
- WebAssembly - 概述
- WebAssembly - 简介
- WebAssembly-WASM
- WebAssembly - 安装
- WebAssembly - 编译为 WASM 的工具
- WebAssembly - 程序结构
- WebAssembly - JavaScript
- WebAssembly - Javascript API
- WebAssembly - 在 Firefox 中调试 WASM
- WebAssembly - “你好世界”
- WebAssembly - 模块
- WebAssembly - 验证
- WebAssembly - 文本格式
- WebAssembly - 将 WAT 转换为 WASM
- WebAssembly - 动态链接
- WebAssembly - 安全
- WebAssembly - 使用 C
- WebAssembly - 使用 C++
- WebAssembly - 使用 Rust
- WebAssembly - 使用 Go
- WebAssembly - 使用 Nodejs
- WebAssembly - 示例
- WebAssembly 有用资源
- WebAssembly - 快速指南
- WebAssembly - 有用的资源
- WebAssembly - 讨论
WebAssembly - 使用 Rust
为了获得 RUST 编译代码,我们将使用 WebAssembly.studio 工具。
转到WebAssembly.studio,可通过转到https://webassembly.studio/获取,它将显示如下所示的屏幕 -

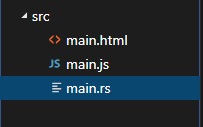
单击空 Rust 项目。完成后,您将在 src/ 文件夹中获得三个文件 -

打开文件 main.rs 并更改您选择的代码。
我添加以下函数,该函数将添加两个给定的数字 -
fn add_ints(lhs: i32, rhs: i32) -> i32 {
   lhs+rhs
}
main.rs 中可用的代码如下 -
#[no_mangle]
pub extern "C" fn add_one(x: i32) -> i32 {
   x + 1
}
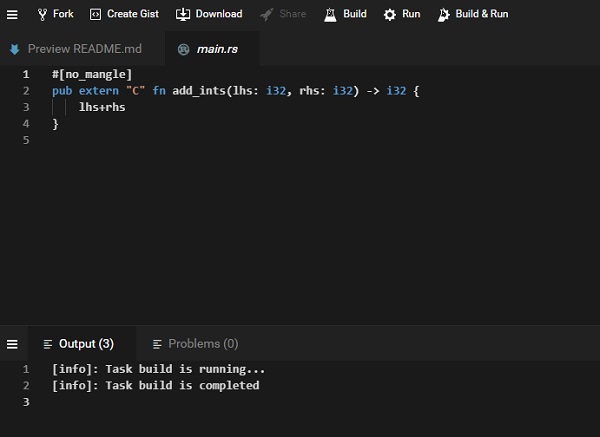
将 fn add_one 替换为您的,如下所示 -
#[no_mangle]
pub extern "C" fn add_ints(lhs: i32, rhs: i32) -> i32 {
   lhs+rhs
}
在 main.js 中,将函数名称从 add_one 更改为 add_ints
fetch('../out/main.wasm').then(
   response =>
   response.arrayBuffer()
).then(bytes => WebAssembly.instantiate(bytes)).then(results => {
   instance = results.instance;
   document.getElementById("container").textContent = instance.exports.add_one(41);
}).catch(console.error);
将instance.exports.add_one替换为instance.exports.add_ints(100,100)
fetch('../out/main.wasm').then(
   response =>
   response.arrayBuffer()
).then(bytes => WebAssembly.instantiate(bytes)).then(results => {
   instance = results.instance;
   document.getElementById("container").textContent = instance.exports.add_ints(100,100)
}).catch(console.error);
单击 web assembly.studio UI 上可用的构建按钮来构建代码。

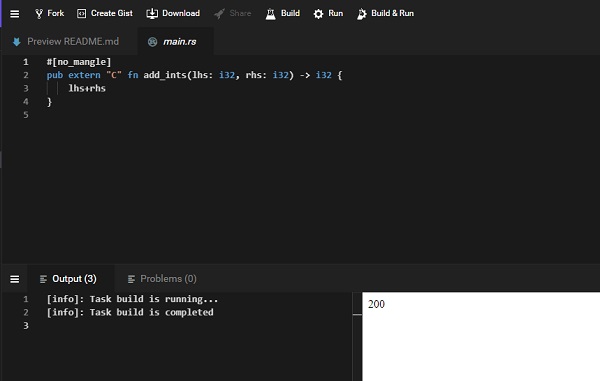
构建完成后,单击 UI 上的“运行”按钮,查看输出 -

当我们传递 instance.exports.add_ints(100,100) 时,我们得到的输出为 200。
同样,您可以为 rust 编写一个不同的程序,并在 webassemble.studio 中对其进行编译。