AppML - 第一个应用程序
让我们从一个简单的应用程序开始。
第 1 步:创建数据
第一步是创建一个数据文件,该文件将提供要在应用程序 UI 中显示的记录。创建学生数据.js
学生记录.js
{
"students":[
   {"studentName":"Ramesh","class":"12","section":"White"},
   {"studentName":"Suresh","class":"12","section":"Red"},
   {"studentName":"Mohan","class":"12","section":"Red"},
   {"studentName":"Robert","class":"12","section":"Red"},
   {"studentName":"Julie","class":"12","section":"White"},
   {"studentName":"Ali","class":"12","section":"White"},
   {"studentName":"Harjeet","class":"12","section":"White"}
]}
第 2 步:创建应用程序 HTML
学生申请.html
<!DOCTYPE html>
<html lang="en-US">
   <title>Students</title>
   <style>
      table {
         border-collapse: collapse;
         width: 100%;
      }

      th, td {
         text-align: left;
         padding: 8px;
      }

      tr:nth-child(even) {background-color: #f2f2f2;}
   </style>
   <script src="https://www.w3schools.com/appml/2.0.3/appml.js"></script>
<body>
   <table appml-data="students_records.js" appml-controller="myController">
      <tr>
         <th>Student</th>
         <th>Class</th>
         <th>Section</th>
      </tr>
      <tr appml-repeat="students">
         <td>{{studentName}}</td>
         <td>{{class}}</td>
         <td>{{section}}</td>
      </tr>
   </table>
   <script>
      function myController($appml) {
         if ($appml.message == "display") {
            if ($appml.display.name == "studentName") {
               $appml.display.value = $appml.display.value.toUpperCase();
            }
         }
      }
   </script>
</body>
</html>
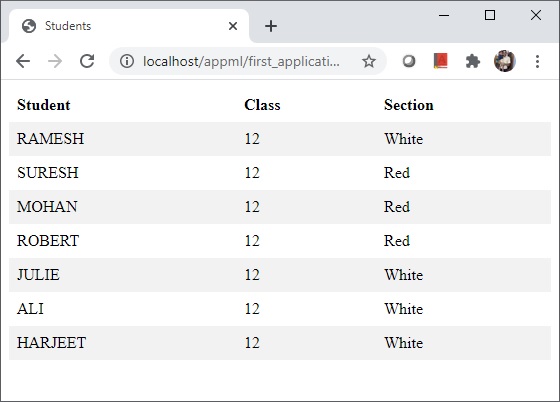
输出
在Web Server上部署应用程序并访问html页面。验证输出。

