- Ubuntu Tutorial
- Ubuntu - Home
- Ubuntu - Overview
- Ubuntu - Flavors
- Ubuntu - Environment
- Ubuntu - Device Drivers
- Ubuntu - Software Center
- Ubuntu - Browsers
- Ubuntu - Email
- Ubuntu - Messaging
- Ubuntu - Media Players
- Ubuntu - User Management
- Ubuntu - Files & Folders
- Ubuntu - Word Writer
- Ubuntu - Spreadsheets
- Ubuntu - LibreOffice
- Ubuntu - Command Line
- Ubuntu - Scripting
- Ubuntu - Networking
- Ubuntu - Server Installation
- Ubuntu - Secure Shell
- Ubuntu - Development
- Ubuntu - Nginx
- Ubuntu - Virtual Machines
- Ubuntu - Installing MySQL & Python
- Ubuntu - Node.js
- Ubuntu - Docker
- Ubuntu - On the Cloud
- Ubuntu Useful Resources
- Ubuntu - Quick Guide
- Ubuntu - Useful Resources
- Ubuntu - Discussion
Ubuntu-电子邮件
Ubuntu 中的默认电子邮件客户端是 Thunderbird。以下步骤显示如何开始使用 Thunderbird 作为电子邮件客户端软件。
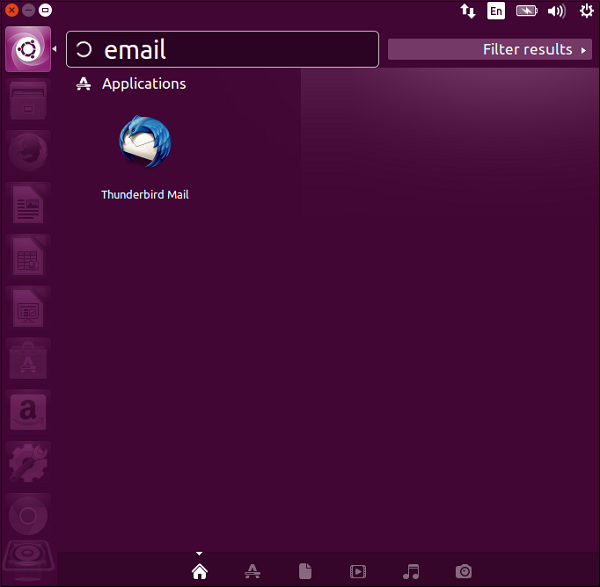
我们可以使用 Ubuntu 中的搜索功能快速搜索任何应用程序。
步骤 1 - 双击搜索工具,输入电子邮件关键字,将出现 Thunderbird 电子邮件的搜索结果。
步骤 2 - 双击搜索结果以启动 Thunderbird 邮件客户端。启动电子邮件客户端后,将请求将电子邮件帐户链接到邮件客户端。
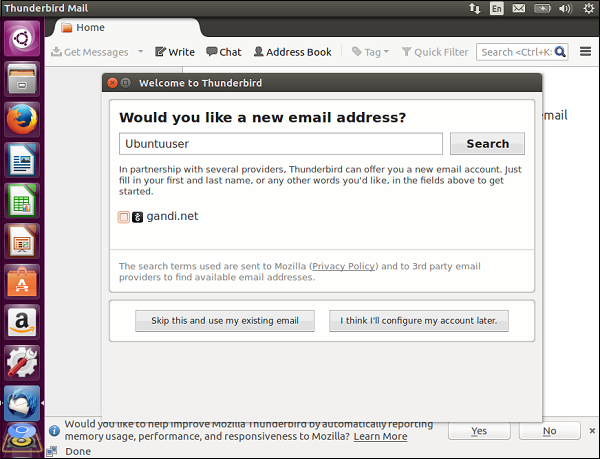
步骤 3 - 单击“跳过此步骤并使用我现有的电子邮件”按钮,以便我们可以使用当前的电子邮件凭据。
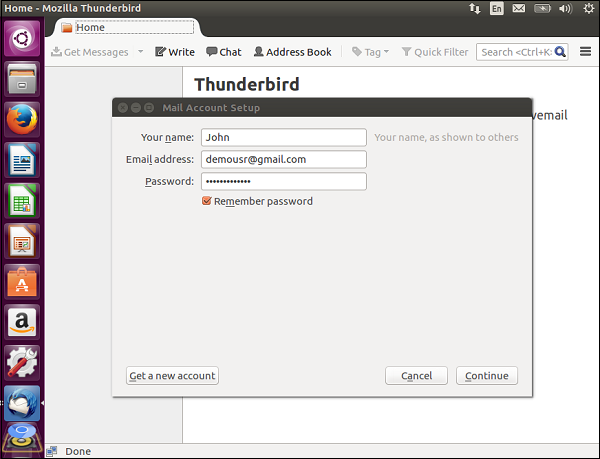
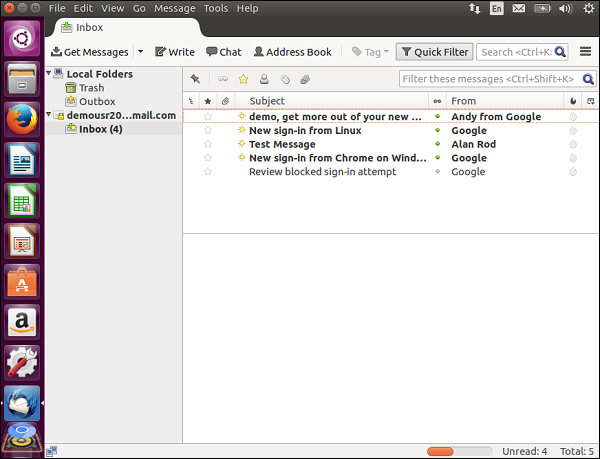
步骤 4 - 输入所需的凭据,然后单击“继续”按钮继续。配置完成后,电子邮件客户端将提供任何电子邮件客户端的通用功能。现在,我们将能够查看收件箱以及收件箱中的所有邮件。
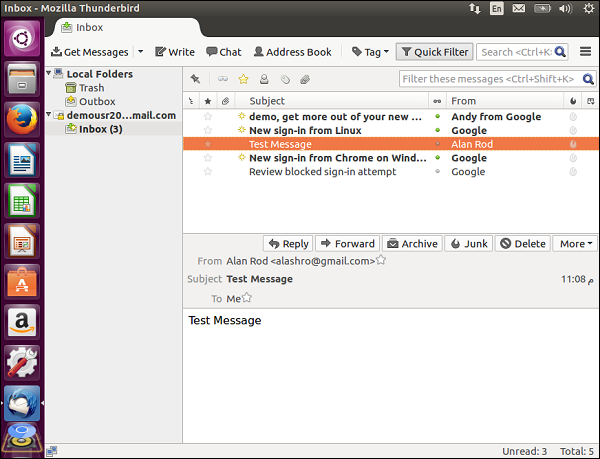
步骤 5 - 单击任何消息以获取有关收到的电子邮件的更多信息,如以下屏幕截图所示。
发送电子邮件
步骤 1 - 在“菜单”选项中,单击“写入”选项以创建需要发送的消息。
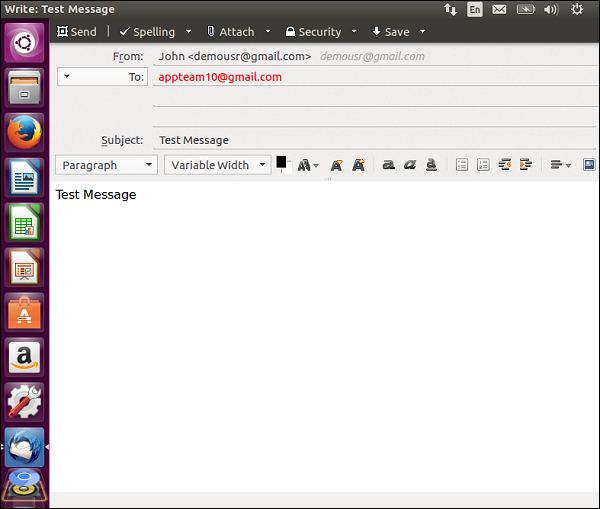
步骤 2 - 输入消息详细信息。完成后,单击“发送”按钮。请注意,还有一个选项可以进行拼写检查和添加附件。
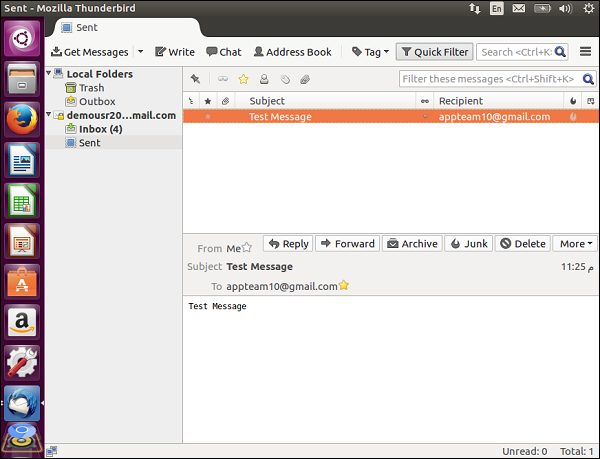
已发送的消息将显示在“已发送消息”部分中,如下图所示。
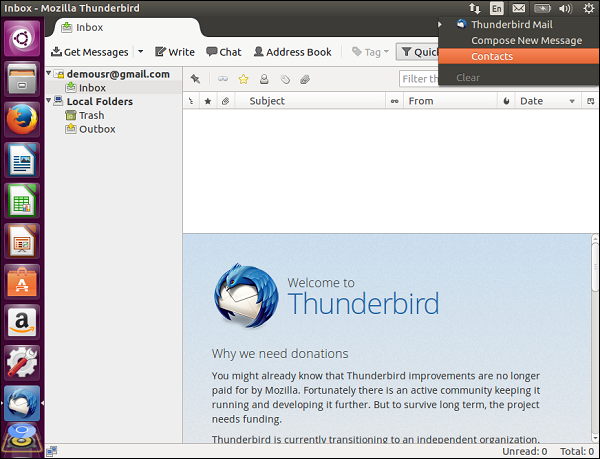
在屏幕的右侧,有一些快捷方式可用于查看邮件、撰写新消息和查看联系人,如以下屏幕截图所示。