- Ubuntu Tutorial
- Ubuntu - Home
- Ubuntu - Overview
- Ubuntu - Flavors
- Ubuntu - Environment
- Ubuntu - Device Drivers
- Ubuntu - Software Center
- Ubuntu - Browsers
- Ubuntu - Email
- Ubuntu - Messaging
- Ubuntu - Media Players
- Ubuntu - User Management
- Ubuntu - Files & Folders
- Ubuntu - Word Writer
- Ubuntu - Spreadsheets
- Ubuntu - LibreOffice
- Ubuntu - Command Line
- Ubuntu - Scripting
- Ubuntu - Networking
- Ubuntu - Server Installation
- Ubuntu - Secure Shell
- Ubuntu - Development
- Ubuntu - Nginx
- Ubuntu - Virtual Machines
- Ubuntu - Installing MySQL & Python
- Ubuntu - Node.js
- Ubuntu - Docker
- Ubuntu - On the Cloud
- Ubuntu Useful Resources
- Ubuntu - Quick Guide
- Ubuntu - Useful Resources
- Ubuntu - Discussion
Ubuntu-服务器安装
Ubuntu 也有服务器版本。此版本用于托管应用程序,例如基于 Web 的应用程序。服务器版本可以像Ubuntu桌面版本一样从Ubuntu站点下载。
为了本教程的目的,我们来看看服务器版本 14.04 的安装,它是最流行的 Ubuntu 版本之一。以下是安装步骤。
步骤 1 - 从链接下载服务器版本 - http://releases.ubuntu.com/14.04/
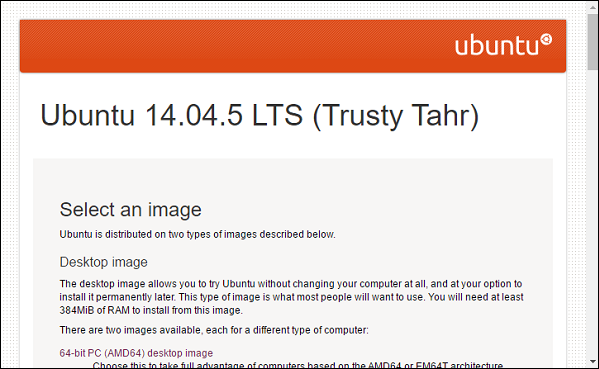
步骤 2 - 服务器版本下载完成后,将其放入 USB 设备或可启动 DVD 上。从可启动设备启动硬件。
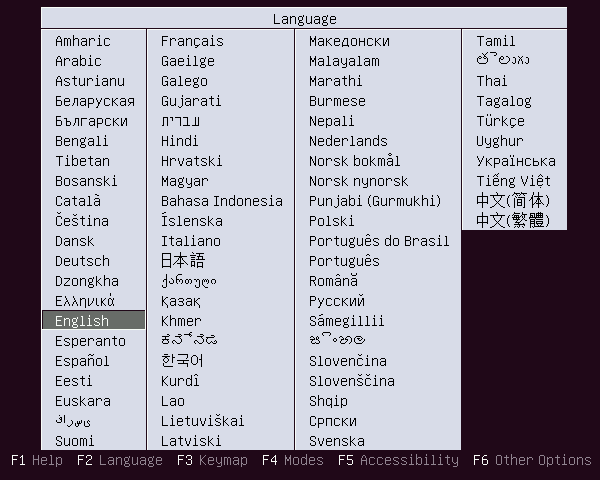
步骤 3 - 系统提示选择安装语言。选择英语并按 Enter 按钮。
步骤 4 - 在下一步中,选择安装 Ubuntu 服务器的选项,然后按 Enter 按钮。

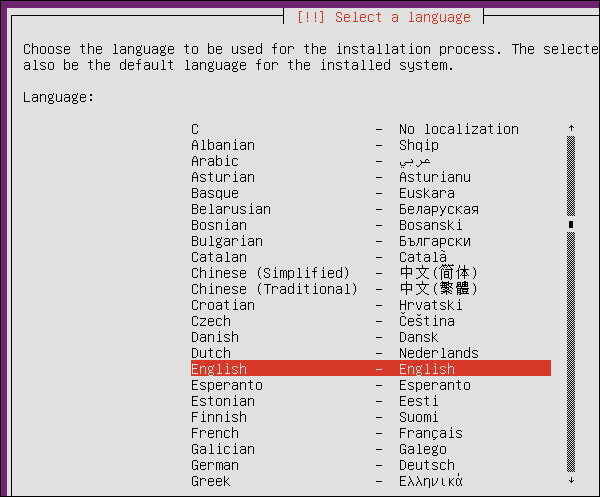
步骤 5 - 系统再次提示选择安装语言。选择英语并按 Enter 按钮。
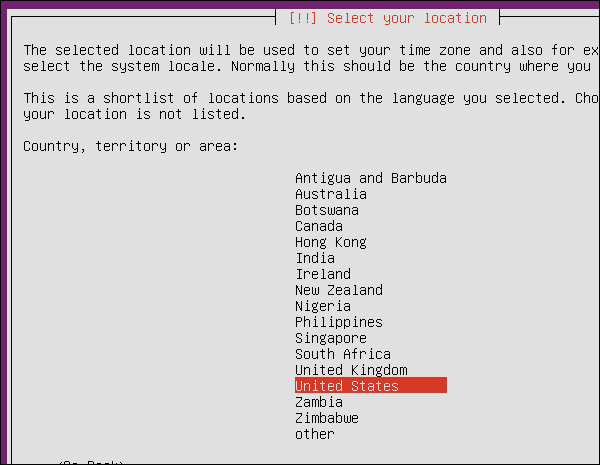
步骤 6 - 在下一个屏幕中,选择所需的区域,然后按 Enter 按钮。
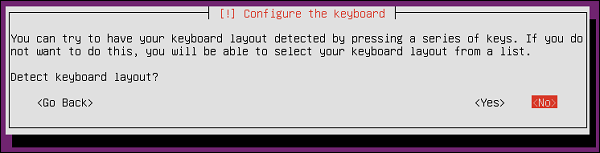
步骤 7 - 下一步包括检测键盘布局。选择“否”选项并按 Enter 按钮。
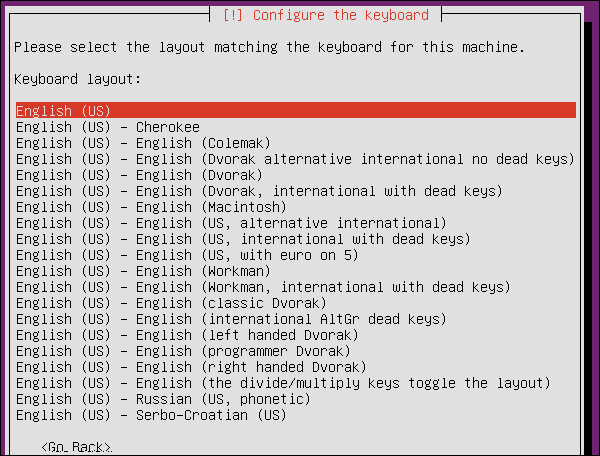
步骤 8 - 在下一个屏幕中,单击英语(美国)作为键盘布局,然后按 Enter 按钮。
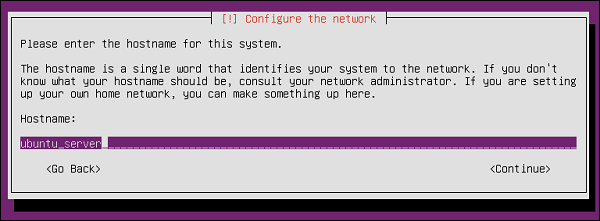
步骤 9 - 执行一组初始配置步骤后,系统将提示我们输入系统名称。输入Ubuntuserver并按Enter键。
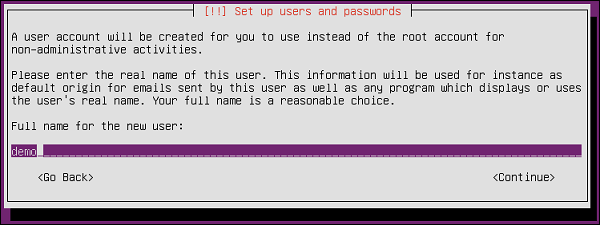
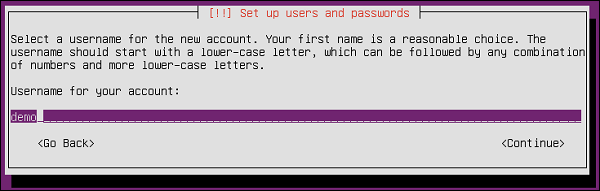
步骤 10 - 然后系统将提示您输入要创建的帐户的真实姓名和用户名。在两个屏幕上输入名称“demo”并按 Enter 键。
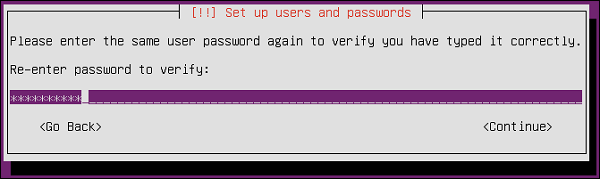
步骤 11 - 现在我们需要输入新帐户的密码。输入密码并按 Enter 按钮。系统会要求验证密码。
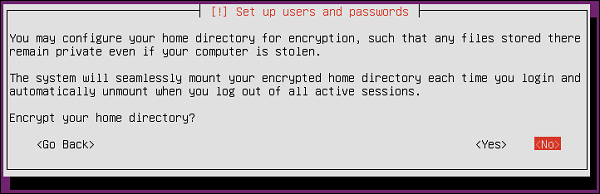
步骤 12 - 然后系统询问我们是否要加密主目录。目前,让我们说“否”并按 Enter 继续。加密是这样的,如果任何人侵入系统,他们将无法窃取加密的数据。
一旦我们成为 Ubuntu 服务器的高级用户,我们就可以选择“是”作为选项。但现在我们将其保留为未加密。
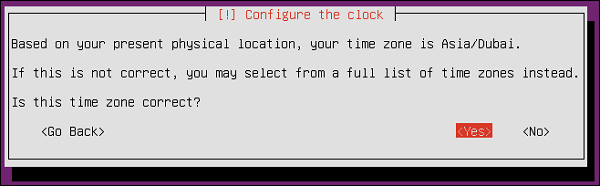
步骤 13 - Ubuntu 服务器安装将设置时间设置。选择“是”并按 Enter 按钮继续。
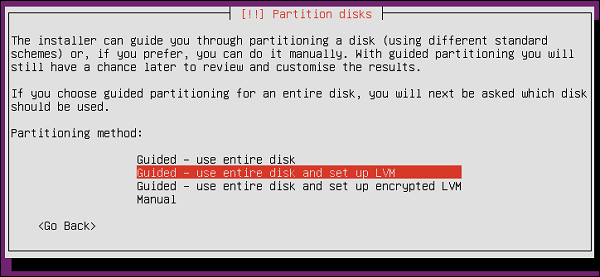
步骤 14 - 接下来将进行磁盘设置。选择选项“引导 – 使用整个磁盘并设置 LVM”,然后按 Enter 按钮继续。
步骤 15 - 安装将删除磁盘上的所有数据。由于这是全新安装,因此这不是问题。单击 Enter 按钮继续。
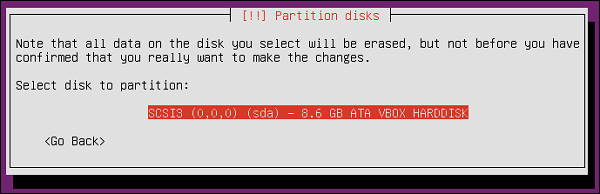
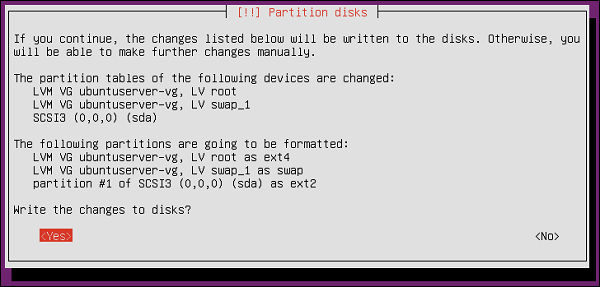
步骤 16 - 我们将被要求确认对磁盘的所有更改。选择“是”选项并按 Enter 按钮继续。
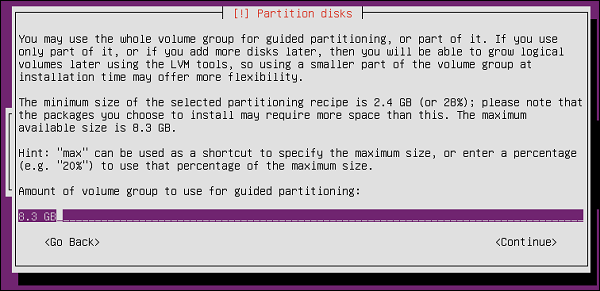
步骤 17 - 安装将检测硬盘的大小。点击 Enter 按钮继续。
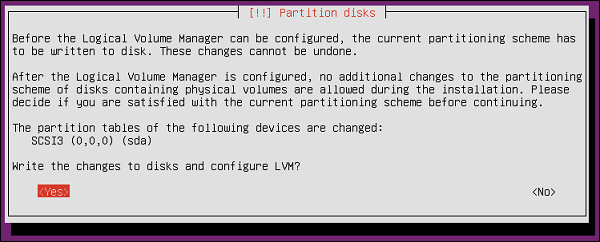
步骤 18 - 然后系统要求完成对磁盘的更改。选择“是”选项并按“Enter”按钮继续。
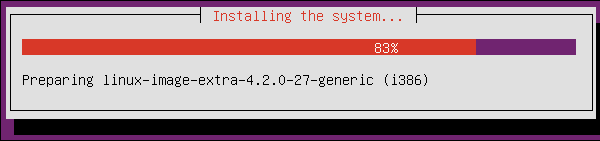
然后系统将开始执行一系列安装步骤。
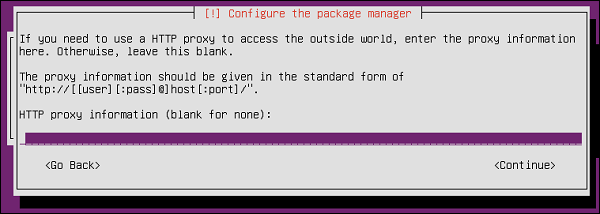
步骤 19 - 然后它会要求配置代理设置。我们可以保留此设置不变,然后按 Enter 按钮。
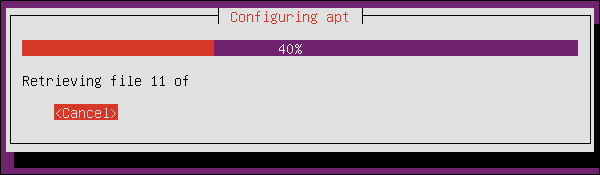
然后安装将开始配置 apt 包管理器。
然后将开始安装必要的软件。
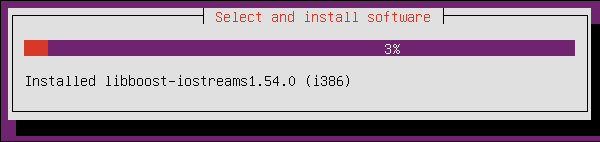
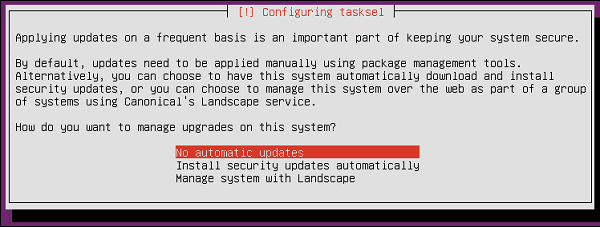
步骤 20 - 然后系统询问我们是否要配置自动更新。现在,选择“无自动更新”并按 Enter 按钮。
步骤 21 - 下一步是安装任何其他软件。选择“OpenSSH”服务器,允许远程连接到服务器。按 Enter 按钮继续。
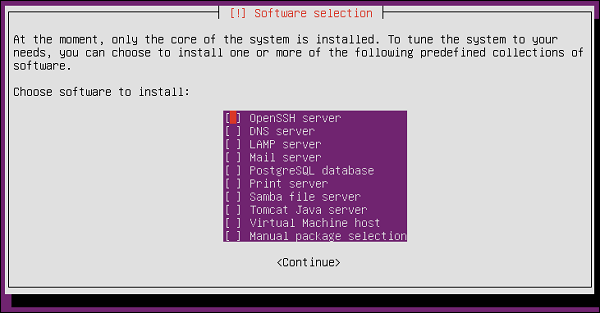
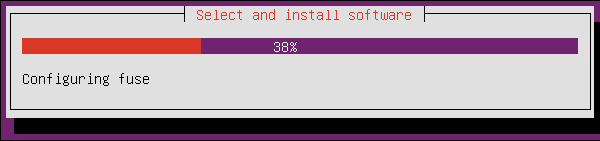
系统将开始安装系统上的剩余软件。
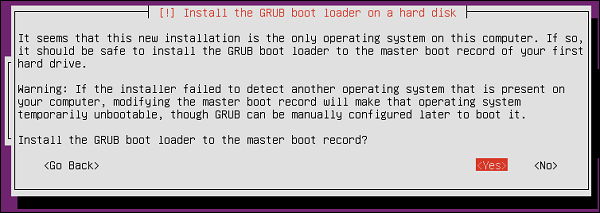
步骤 22 - 系统现在请求安装 GRUB 引导加载程序。选择“是”选项并按 Enter 按钮继续。
步骤 23 - 安装完成后,按“继续”选项继续。
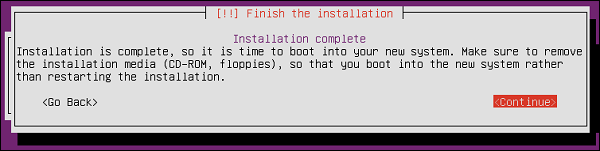
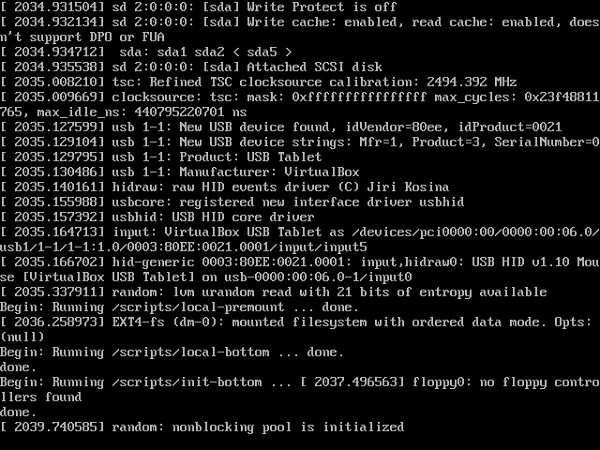
安装后系统将重新启动。
步骤 24 - 然后我们将被要求登录系统。输入安装时输入的凭据。
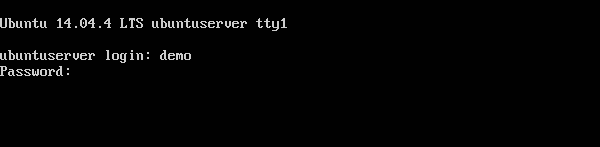
我们终于可以登录系统了。
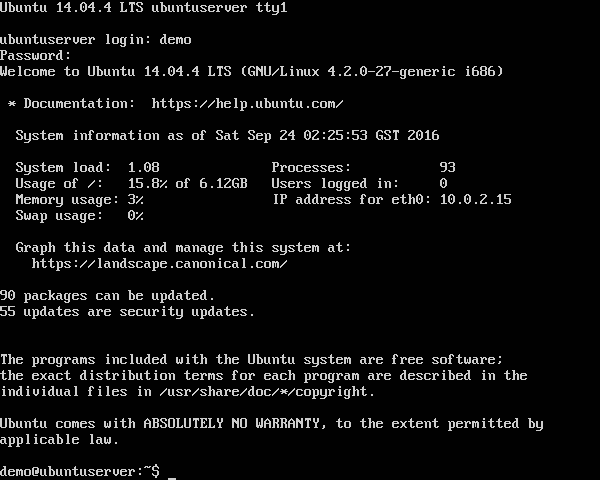
我们已经成功安装了Ubuntu的服务器版本。