- Ubuntu Tutorial
- Ubuntu - Home
- Ubuntu - Overview
- Ubuntu - Flavors
- Ubuntu - Environment
- Ubuntu - Device Drivers
- Ubuntu - Software Center
- Ubuntu - Browsers
- Ubuntu - Email
- Ubuntu - Messaging
- Ubuntu - Media Players
- Ubuntu - User Management
- Ubuntu - Files & Folders
- Ubuntu - Word Writer
- Ubuntu - Spreadsheets
- Ubuntu - LibreOffice
- Ubuntu - Command Line
- Ubuntu - Scripting
- Ubuntu - Networking
- Ubuntu - Server Installation
- Ubuntu - Secure Shell
- Ubuntu - Development
- Ubuntu - Nginx
- Ubuntu - Virtual Machines
- Ubuntu - Installing MySQL & Python
- Ubuntu - Node.js
- Ubuntu - Docker
- Ubuntu - On the Cloud
- Ubuntu Useful Resources
- Ubuntu - Quick Guide
- Ubuntu - Useful Resources
- Ubuntu - Discussion
Ubuntu - 虚拟机
Ubuntu 也可以安装为虚拟机。一些支持虚拟机的软件是 -
- 微软Hyper-V
- VMware工作站
- 甲骨文虚拟盒
让我们使用 Oracle VirtualBox 创建 Ubuntu 虚拟机。Oracle VirtualBox 是 Oracle 的一款免费工具。以下是安装虚拟机的步骤。
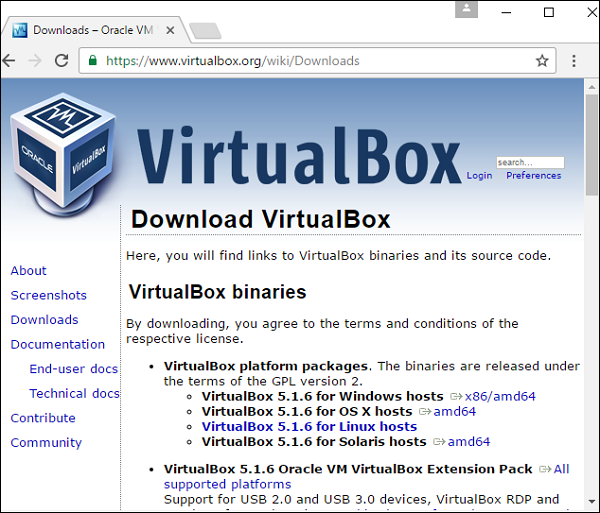
步骤 1 - 从 oracle 站点下载 Oracle VirtualBox - https://www.virtualbox.org/

步骤 2 - 转到下载部分并下载 Windows 版本。
步骤 3 - 下载完成后,安装 VirtualBox。启动安装程序。单击以下屏幕上的“运行”按钮。

步骤 4 - 单击后续屏幕上的“下一步”按钮。

步骤 5 - 选择适当的文件夹位置,然后单击“下一步”按钮。

步骤 6 - 在后续屏幕上单击“下一步”。

步骤 7 - 单击下一个屏幕上的“是”按钮继续安装。

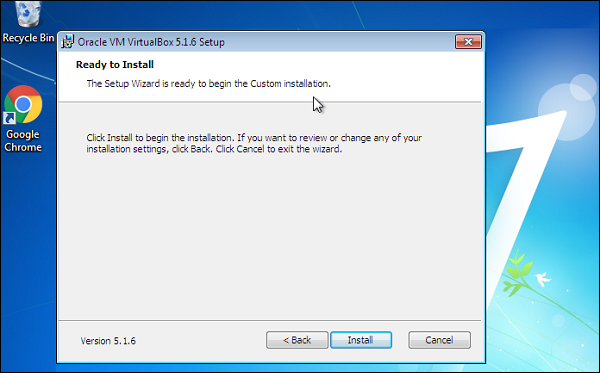
步骤 8 - 单击下一个屏幕上的“安装”。
步骤 9 - 安装完成后,启动 Oracle VirtualBox。在启动屏幕上,单击“新建”菜单选项。

步骤 10 - 为虚拟机指定名称并将类型指定为 Ubuntu,然后单击“下一步”按钮。

步骤 11 - 在下一个屏幕中,保持推荐的 RAM 不变,然后单击“下一步”按钮。

步骤 12 - 接受虚拟硬盘的默认设置,然后单击“创建”按钮。

步骤 13 - 接受硬盘类型并单击“下一步”按钮。

步骤 14 - 接受物理硬盘分配的默认类型,然后单击“下一步”按钮。

步骤 15 - 接受默认文件位置并单击“创建”按钮。

步骤 16 - 现在虚拟机已创建,单击“设置菜单”选项。

步骤 17 - 转到“存储”选项,单击“空磁盘”图标并浏览查找 Ubuntu iso 映像。然后单击“确定”按钮。

最后单击开始按钮。系统提示安装Ubuntu。按照安装章节中的步骤操作,我们将拥有一个托管 Ubuntu 的虚拟机。
